Nobody wants their Blog post to look like a plain chunk of text. As a Blogger you would naturally want to add images, if not in every, at least in some of your Blog posts. If you have just started using Ghost as your Blogging platform, you might have noticed while creating a post that there is no obvious way to upload and insert pictures or photos.
Ghost is a new and some things may not be obvious at first. With time, more features are expected to be added to streamline the Blog publishing workflow. But for now, when there is no apparent way to click a button and upload your pictures, you should be aware of the currently available methods to insert pictures in your Blog posts.
Ghost uses Markdown to convert the text entered by you into HTML. You enter plain text on the left side of the Ghost editor and on the right side see the preview of what the post will look like after being published. In this simple guide, we will show you how to add photos or images to your Blog posts in Ghost.
Inserting an image in your Blog post by uploading from your computer:
Note: For now, images can only be placed in a new line using the Markdown editor.
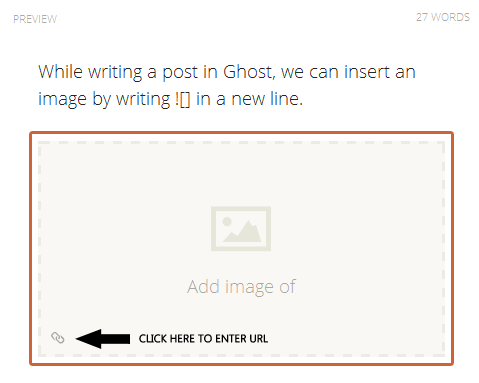
To upload and insert an image, you need to enter ![]() in a new line on the MARKDOWN side of the editor. After you have entered the symbols ![](), an image upload area will appear on the PREVIEW side of the editor. Now, you can click on this image upload area and upload your picture, or you can drag an image from your computer to the upload area.
After the image has been uploaded, you can see it in the preview as shown below. If you are not happy with the image you have uploaded, or if you want to change the image, you can delete it by clicking on the delete icon on the top-right of the image in preview.

By using the URL of an existing image (an image which is already available on the Web, e.g. an image you have uploaded to Flickr):
To insert an image whose URL you know, type ![]() in a new line on the Markdown side of the editor, then enter the URL of the image in the parentheses (). It should look something as . Remember that you will need the complete URL of the image hosted externally (i.e. the images which are not hosted on your server).

How to add alt and title attributes to images in Ghost?
To add the alt attribute to an image, write the alt text in the square brackets, e.g. ![This is the alt text]().
Currently, Ghost does not support adding title tags using the Markdown editor. However, you can use a workaround for now. After the image has been uploaded, you can use its URL to directly write the HTML for the image tag as shown below as an example.
<img src="/content/images/2014/Mar/fall_tree_leaves-1.jpg" title="TITLE FOR THE IMAGE" alt="ALT TEXT FOR THE IMAGE">
Related:

